Pages

Thursday, November 11, 2010

Button, button, whose got a button?

Hi everyone!  I hope you had a great day.  Today's card is one that I made for a friend and colleague with the maiden name of Button--she adores them and rightfully so!  I was so excited to feature some of our fabulous buttons on her birthday card.  The layout was inspired by a card on the cover of the Idea Book & Catalog and I couldn't wait to make it for her!  Just look at these beauties:

 
OK, technically one is a brad but it could be a button, right?  My favorites are the biggest ones in Old Olive, Rich Razzleberry, Crumb Cake and Tempting Turquoise.  Look at all those pretty swirls!  They almost look glass don't they?  This is a pretty simple layout and design--the better to let the buttons speak for themselves!  So, I will make this a quick post tonight.  Supplies are listed below--sorry I've neglected that lately, too pooped!  LOL.  Please let me know if you have any questions and thanks for stopping by...cheers!

supplies:
stamps: medallion; sincere salutations
ink: crumb cake, early espresso
paper: crumb cake CS; bella bleu DSP (retired); taste of textiles specialty paper (retired)
xtras: old olive striped grosgrain ribbon; scallop oval & large oval punches; antique brads; designer button collection (brights & neutrals); retired whisper white flower button (don't remember the name!) 

Wednesday, November 10, 2010

Dream Garden for The Color Dare {84}

Hello Color Dare fans!  It's time for another color challenge and here's what Riley has for us:
Color Dare 83
Soft Suede
Pear Pizzazz
Night of Navy
And here is what I've created for you:


The stamp-a-ma-jig made easy work of the center panel.  I started with a piece of Naturals Ivory cardstock (it's okay to add a neutral) and stamped the beautiful panel from Dream Garden in all 3 challenge colors.  I left a little bit of ivory cardstock at the bottom so I could wrap it with the scrunchy ribbon technique in Night of Navy taffeta ribbon.  


I made a flower embellishment from Night of Navy cardstock and layered two flowers from the Flower Fusion sizzlit.  The card base looked too plain to me so I chose another Asian-themed stamp set, Eastern Blossoms,  and stamped the cherry blossoms in Soft Suede as a frame.    
When I was finished, I realized that I wasn't finished--there was no sentiment!  I stamped it on the side to see what it would look like and I really like the effect.  What do you think?


And I couldn't ignore the inside....so the crane was inked up again in Pear Pizzazz and a sentiment from Sincere Salutations stamped in Night of Navy.

Sorry to make this a quick post tonight...please let me know if you have any questions or comments--love to hear from you.  Please be sure to check out the rest of the Design Team.  I'm sure you will find some fabulous inspiration on their blogs:

Sunday, November 7, 2010

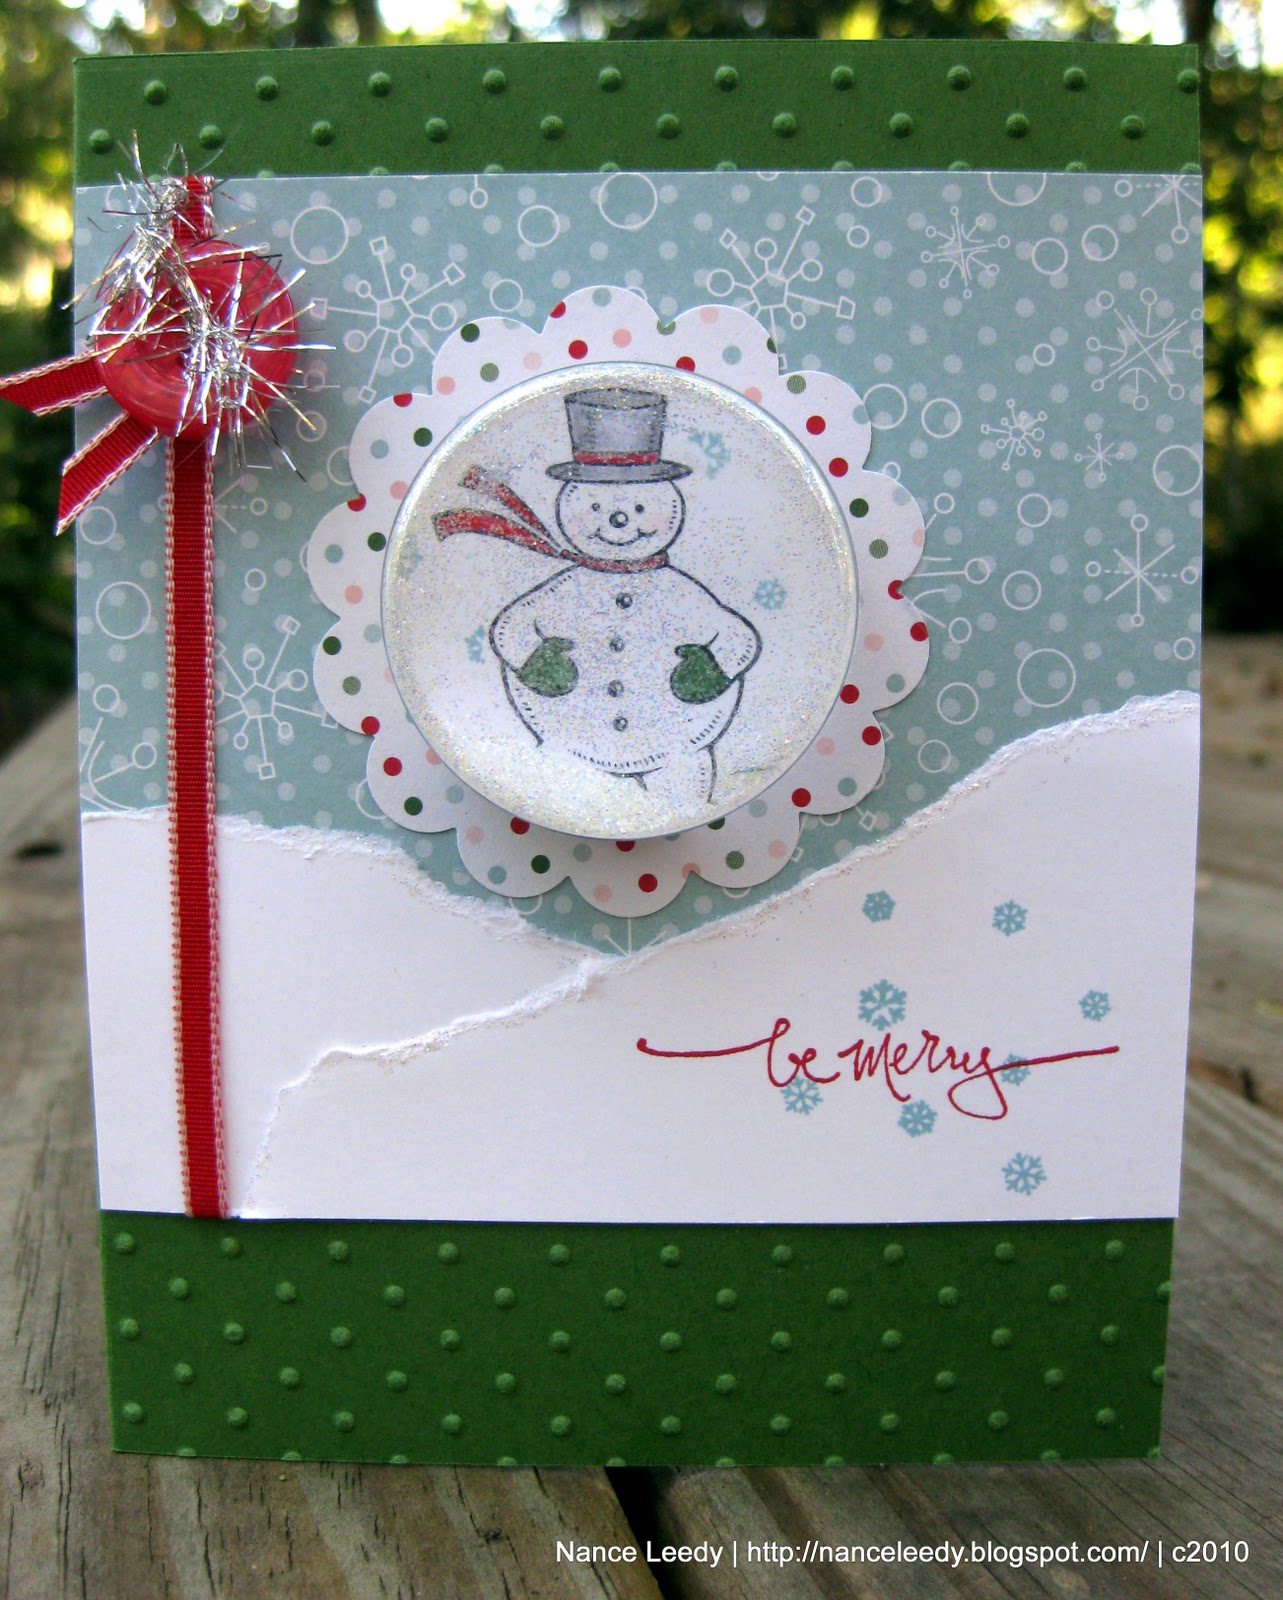
Merry Snowman for the Paper Players {23}

Happy Sunday everyone!  It's Paper Players day and Lesley has chosen a theme for our challenge this week...can you guess it?  That's right, it's snowmen!  Or snowpeople or snowperson--take your pick--anything with a snow"person".  I knew right away that I was going to make a shaker card with Dazzling Diamonds and SU's sweet treat cups.


Isn't he just the cutest?  So round and jolly!  I stamped the merry snowman from Jolly Old Saint Nick onto Whisper White with jet black Stazon and colored his scarf, mittens and cheeks with Real Red, Garden Green and Blushing Bride markers, respectively.  I used my Basic Gray ink pad and a blender pen to shade his hat.  The snowflakes from the same set where stamped behind him in Baja Breeze and I added some Dazzling Diamonds to the treat cup before sealing it up.  When my 6YO daughter saw this she couldn't stop shaking and playing with it!  I added some torn pieces of Whisper White for some snowy hills (trimmed in more Dazzling Diamonds!) and paired them with a greeting from one of my favorite (retired) sets for sentiments: Warm Words.


Some 1/8" taffeta ribbon wrapped up the side with a Real Red button and some silver tinsel trim from the Holiday mini catalog.  It's just not Christmas without tinsel!!


More coordinating papers and colors on the inside...love that cute polka dot paper from the Candy Lane specialty designer paper!  Another snowman, this time in Baja Breeze, and the sweet little sentiment from the same stamp set.  Love it when it all comes together!

So, what do you think?  Will you share a snowman or two with us this week?  If you don't have a snowman stamp, punch some circles or use buttons--so  many possibilities!  Whatever you do, come back to The Paper Players blog to link up your creation before midnight (PST) Friday November 12th.  We hope you'll join us for another week of crafty goodness...take care!  

Wednesday, November 3, 2010

Medallion Damask: Color Dare {83}

Hi crafty friends!  Welcome to another challenge week at The Color Dare where Riley is testing us once again with this beauty:
Color Dare 83
Garden Green
Blushing Bride
Perfect Plum
Very Vanilla
 I really liked the layout of this previous card and I was inspired by the Damask challenge over Moxie Fab World.  So, combined with this week's CD colors, here is what I created for you:
I adore the Medallion stamp and I really like it stamped off the Blushing Bride panel here.  I drew over a few areas of the Medallion with my glue pen and sprinkled on some Dazzling Diamonds.  This beautiful sentiment is from the level 2 hostess set, Peaceful Season, which I stamped in Garden Green on vellum cardstock and cut out with the (retired) Scalloped Oval frame die.  I used the largest of the Basic Rhinestones and snipped off a piece of stampin' dimensionals to tuck under each one.  This popped the oval up enough but allowed the dimensionals to hide under the rhinestones!  The other side of the oval is held up by another dimensional hiding under the beautiful dove.

I stamped the dove from the same set in Versamark ink onto Very Vanilla, sprinkled with Heat & Stick powder until it turns to liquid.  Then I sprinkled it with Dazzling Diamonds and heat until set.  The Heat & Stick powder is just sticky enough to hold onto the DD and the result is one sparkly dove!  A little bit of Very Vanilla seam binding ribbon was scrunched up on the edge for a soft and gentle ribbon treatment.


This medallion is so pretty that I stamped it again on the inside, this time in Blushing Bride and again embellished it with some Dazzling Diamonds.  The Seasonal Sentiments set provided the perfect greeting when stamped in Garden Green.  Head on over to the other designer's blogs to see what they've crafted for you.  You're sure to find lots of inspiration there:
What will YOU make with these colors?  We can't wait to see.  Be sure to visit us at The Color Dare and link up your creation.  Thanks for visiting!

supplies:
stamps: medallion; peaceful wishes; seasonal sentiments
ink: garden green, blushing bride, perfect plum, versamark
paper: garden green, blushing bride, very vanilla, vellum CS
xtras: scallop oval die (retired); basic rhinestones; glue pen; dazzling diamonds; very vanilla seam binding ribbon; heat & stick powder

Monday, November 1, 2010

Honoring our Ancestors

Hi everyone!  I hope you had a wonderful and magical Halloween.  I have no card to share with you today but hope you will indulge me for a moment....I would like to share our family's newest tradition...celebrating Day of the Dead.  I've always been fascinated by Dia de los Muertos and we thought it would be a wonderful idea to make a special day where we honor our ancestors and celebrate their lives.  Our daughter learned about Dia de los Muertos in her Spanish class and talked non-stop about it.  She brought home coloring pages and skull masks she made in school.  So yesterday, we gathered photos and memorabilia of our family and beloved pets and created our own Dia de los Muertos la ofrenda that you see above.  In this way we honor our family and let them know that they are with us in thought and spirit.   (click on the picture for a bigger view)

Our daughter, Arden, was so excited by this holiday that she asked to go to a local import boutique that offered Day of the Dead crafts for children.  She remembered that we happened upon it last year and asked to go again--much to the delight of the shopkeeper!  This weekend, she made the sugar skull you see in the front of the picture.  They have authentic sugar skulls, imported from Mexico, and all kinds of trims and decorations to embellish to her heart's content.  In fact, she is so excited about it that she is sharing it with you over on her blog, Arden's Garden of Crafts.  I know she would love to hear from you!

Whether your family is near or far, take a moment to send them good thoughts today and light a candle for them.  You will be glad that you did.  Thanks for stopping by and for  listening!