Pages

Sunday, August 28, 2011

Easy Holidays {PP61}

Happy Paper Players Sunday, friends! Our talented team mate, Jaydee has a fabulous sketch for you this week:
I love this sketch and I think I will be using it a lot--thanks Jaydee!  Right away, it brought to mind tree ornaments and holiday cards so with the holiday season a mere two months away, I thought it was time to get started on my stash of Christmas cards!
I see that I wasn't the only team member who used this fun set called Easy Events!  The delicate spray of leaves and berries is so clean and I love that the sentiment is built right in for perfect alignment every time! The black card base has an extra layer of black that was embossed with the Vintage Wallpaper folder and spritzed with homemade Glimmer Spray.  The center panel is First Edition specialty paper trimmed with a sliver of Real Red punched with the scallop ribbon border punch.  I tucked some 1 1/4" Old Olive striped grosgrain ribbon under the embossed black panel at the bottom, tied it with some Very Vanilla seam binding ribbon and attached at the top with a big glue dot.  Attaching the ribbon to the extra layer of black cardstock saved me from wrapping it around the whole card front and saved quite a bit of ribbon!
The berry sprig was stamped onto Very Vanilla with jet Black Stazon and the leaves were colored with an Old Olive watercolor crayon.  I just bought my first set of these and I love that they come in each color family and give a watercolor effect without the water and no pilling of your paper!  My favorite detail though is the Basic Rhinestones colored with a red Sharpie marker.  Just color them right on the backing paper, wait a few seconds to make sure they are dry and peel them off as usual!  Such a great technique for making custom colored rhinestones.  (BTW, the wide tip Sharpies give the best coverage).  Wanna see a closer look?
Cute, eh?!  I haven't shown you the inside of a card in a while so I made sure to finish this one for you:
An Old Olive frame from Four Frames was the perfect companion to the sentiment from Petite Pairs.  So, friends, what do you think?  I'd love to hear from you.  Big thanks to all who continue to leave comments for me even though I haven't been 'round to visit lately.  Commenting has taken a back seat to the new school year, busy days at work, and a traveling husband!  I hope to get around to see you all soon--thanks for being patient with me! 

In the meantime, be sure to check out the fabulous inspiration from the rest of The Paper Players Design Team as we say goodbye to our Summer Designers, Lauri and Sandra as well as our August Guest Designer, Carrie.  They have been wonderful to work with and I'm so glad to have "met" them all.  If you decide to play along with us, and we hope you will, be sure to link up your creation to The Paper Players by Friday, September 2nd at midnight (PST).
The Paper Players Design Team
Photobucket
supplies:
stamps: easy events, four frames, petite pairs
ink: jet black stazon, old olive, real red
paper: basic black, real red, very vanilla CS; first edition specialty DSP
xtras: old olive 1 1/4" grosgrain ribbon; scallop ribbon border punch; circle scissors; very vanilla seam binding ribbon; watercolor crayons (brights); basic rhinestones; sharpie marker

Thursday, August 25, 2011

Haunted Forest {CCMC164}

Happy Thursday friends and welcome to another week with the Create with Connie & Mary design team!  We know how much everyone loves a sketch and this week's is a fun one.  Check it out:
As you will see, I took a few liberties with the sketch so feel free to use it as inspiration!  Instead of a square, you could make a standard A2 size card as I did:
I couldn't wait to a) order the Haunted Forest (upcoming holiday mini) single stamp and b) play with it!!  This sketch gave me the perfect canvas for this stamp.  I heat embossed it in black onto Very Vanilla cardstock and sponged the Rich Razzleberry sky with a More Mustard moon.  So spooky!  You have to see this stamp up close to wonder at the detail of it:
and there's even a little mouse in the corner:
Aww!  You can also see that I added some Old Olive grass to tie in with the Old Olive mat.  That itty bitty grass stamp is a favorite of mine and it's from the Pony Party stamp set...go figure!

I hope you enjoyed today's card--I sure love this stamp!  I hope you do too because you'll likely see a lot more of it, LOL!  Be sure to pop on over to check out the rest of the Create with Connie & Mary design team for some fabulous inspiration!  Have a great day friends!


supplies:
stamps: haunted forest (holiday mini); pony party; woodgrain (of course!); four frames
ink: rich razzleberry, more mustard, versamark, old olive
paper: rich razzleberry, more mustard, old olive, very vanilla
xtras: black stampin' emboss powder; decorative label punch; black wide striped grosgrain ribbon; glimmer brads (neutrals), 7-sided tool; color spritzer; crumb cake marker

Tuesday, August 23, 2011

Under a New Canopy!

OMG, I am so excited to share my new blog look with you!  I absolutely love it and I can say that without bragging because I didn't make it, lol!  My dear, sweet, uber-creative friend Lesley did!!  Lesley just launched a new business venture, Banners by Lesley, where she is selling pre-made blog banners using all Stampin' Up products!!
On Saturday August 27th, she will have pre-made blog banners for sale that can be customized with your blog title and information.  She's also offering up some blog candy for one lucky winner in this post here. Lesley is one of the sweetest people I know and I am so glad to have met her through blogging and stamping.  Be sure to check out her sale on Saturday August 27th to grab one of her fantastic banners!  Thank you Lesley for my new look and the best of luck to you in the banner biz!

Sunday, August 21, 2011

Thankful for Three {PP60}

Happy Paper Players Sunday, friends!  This week LeAnne has a great sketch for us that highlights the design principle of three.
The circles in the sketch can be any shape, accessory, stamp or element that you would like.  I played around with a few things but ended up sticking with the circles because I love circles as much as I love threes!
I was also able to play with my sneak peek items from the upcoming Holiday mini catalog including the gorgeous Spice Cake designer series paper which gave me the color scheme of More Mustard, Pool Party & Soft Suede.  For my fall card, I stamped the Woodgrain background stamp in More Mustard on my card base of the same color.   For a little extra "oomph" I sponged the edges of the cardstock with Champagne Shimmer paint:
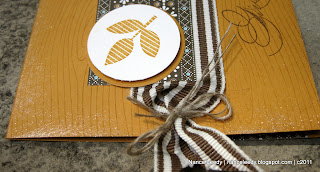
It's just not a holiday card unless it glitters, lol!  Falling Leaves provided the graphic leaves for the focal point and I popped them out with the 1 3/8" circle punch and layered some Soft Suede 1 1/4" striped grosgrain ribbon as well as Spice Cake DSP.
Hand-Penned Holidays is another sneak peek item.  A gorgeous sentiment set that covers all the major fall & winter holidays in one beautifully elegant font.
The inside received some more Spice Cake DSP and a scattering of More Mustard, Pool Party & Soft Suede leaves.  So I hope you liked my Thankful for Three card today.  Please let me know what you think!  Be sure to check out the rest of The Paper Players Design Team for some amazing inspiration.  We hope that you will consider playing along with us this week and if you do, please link up your creation by midnight Friday, August 26th (PST) to be in the running for A Cut Above or Headliner.  Thanks for stopping by today!

supplies:
stamps: falling leaves, woodgrain, hand-penned holidays
ink: more mustard, soft suede, pool party
paper: more mustard, very vanilla, soft suede & pool  party CS; spice cake DSP
xtras: soft suede wide striped grosgrain ribbon; 1 3/4" circle punch, circles #2 die; linen thread; champagne shimmer paint

Thursday, August 18, 2011

A Sunflower for Connie & Mary

Happy Thursday friends and welcome to another week at Create with Connie & Mary!  Connie & Mary alternate between sketch and color challenges and this week they have this color palette to inspire you {CCMC163}:
and here is what I made for you:
I was inspired by a card in our demonstrator magazine, Stampin' Success, that uses the Sunflower background stamp.  First, the sunflower was stamped onto Naturals Ivory cardstock in Tangerine Tango, inked again in TT and stamped onto So Saffron cardstock.  I tore sections from the So Saffron, sponged the edges with SS ink and adhered to the Naturals Ivory panel.  Love the dimension achieved with the torn paper!
I also remember a card my friend Joan made where she cut out the petals of the sunflower.  I loved the effect so I snipped out a trio of petals and popped them up on dimensionals for a little extra lift--thanks Joan!  My mom had the great idea to snail down the tips so they blended in--thanks Mom!
I also stamped a few waterspots from French Foliage and spritzed the whole front with homemade Champagne Glimmer Mist. 
Yes, there's the Pacific Point peeking out on top of the First Edition DSP.  An Antique Brad and a little tiny tag finished it off!  And there you have it!  I hope you liked today's Sunflower card--would love to know what you think.  Be sure to stop over at Create with Connie & Mary to check out the rest of the design team's fabulous  samples.  We hope you'll play along with us!

supplies:
stamps: sunflower; tiny tags
ink: tangerine tango, so saffron, pacific point
paper: tangerine tango, so saffron, pacific point, naturals ivory CS; first edition DSP
xtras: antique brad; scallop trim border punch; champagne shimmer mist

Sunday, August 14, 2011

Fit for a Princess: {PP59}

Happy Paper Players Sunday!  Wowza, do we have a challenge for you this week!  Anne Marie says it's time to get your PINK on!  And with this week's color challenge, you can do exactly that.  Take a look:
Now, I would be lying if I said these colors came easy for me.  :-) I like pink well enough but three shades on one card?!  Well, let's just say it was a challenge for me too!  Here's where I ended up:
What do you think?  Another one that's completely out of my comfort zone..I just kept adding more stuff!!  I was definitely channeling our hostess on this one!  :-)  The Pretty in Pink base card is stamped in the same ink with the En Francais set and layered with some [retired] Rose Red designer paper:
The next layer is the Hello Doily stamp heat embossed with white Stampin' Emboss powder on Pretty in Pink cardstock and fussy cut.  Heat embossing really brings out the beauty of this stamp and makes it look like an actual crochet doily.  Heat embossing also gives a nice edge that makes quick and easy work of the not-so-fussy cutting!
 Fan flowers are hugely trendy right now and since I just received my new Simply Scored board, I was eager to make one!  This one was made with Regal Rose patterned DSP and an Antique Brad.  The sentiment tag was stamped with Petite Pairs in Rose Red and popped out with the Modern Label punch.  I just snipped off one end and tucked it underneath the brad...instant tag!
Petite Pairs is a fun set with coordinating sentiments for outside and inside so this one was stamped in Rose Red over a Pretty in Pink Delicate Doily

Thanks for stopping by today--make sure to see the lovely work of the other Paper Players Design Team princesses!  We hope that you'll pull out your wands and tiaras to get your PINK on this week!  If you do, make sure you finish up before Friday, August 19th at midnight (PST) when this challenge turns into a pumpkin! Until then...have a pinkalicious day!
The Paper Players Design Team
supplies:
stamps: delicate doilies, hello doily, petite pairs
ink: pretty in pink, rose red, versamark
paper: pretty in pink, regal rose, whisper white CS; sweet & sour DSP [retired]; patterns stack DSP (brights)
xtras: scalloped ribbon border punch; rose red seam binding ribbon; antique brads; modern label punch; stampin emboss powder (white)

Thursday, August 11, 2011

Dapper Ducky {CCMC162}

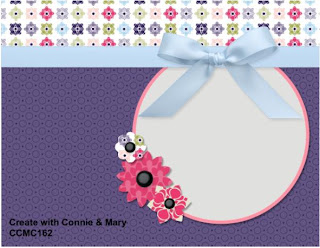
Happy Thursday friends!  Thursday means it's another fun challenge over at Create with Connie & Mary and this week it's a sketch challenge.  Everyone loves sketches right?  So take a look at CCMC162:
A good, clean, classic sketch that can be interpreted any number of ways.  I am in need of yet another baby card for friends of ours so here's what I made for them:
Aww, isn't that little ducky from  Easy Events the cutest?!  He looks so dapper in his hat and umbrella!  Here, let me show you a close-up:
He is stamped in Chocolate Chip ink and colored with a blender pen and ink pads in So Saffron, Marina Mist, Certainly Celery and Peach Parfait.  Did you notice how the umbrella extends beyond the circle?  Before I punched it, I snipped around the top part of the umbrella then slid the cardstock into my 1 3/4" circle punch but pulled the umbrella up so it didn't get punched out!  Just a fun little detail--you know the ones I kinda obsess over! ;-)
I colored the wave with a blender pen and Marina Mist ink and, of course, had to add some Dazzling Diamonds to make them sparkle. Can't seem to make a card without DD lately.
And the finished inside stamped with a Marina Mist sentiment from Friendly Phrases, some Certainly Celery DSP and another little So Saffron ducky!  Pretty quick and easy...the hardest part was deciding what colors to use!

I hope you've liked today's sketch card...check out all the fabulous inspiration from the rest of the Create with Connie & Mary Design Team and then think about what you might do with this sketch.  We would love for you to play along with us!  Thanks for stopping by...cheers!

supplies:
stamps: Easy Events, Friendly Phrases
ink: So Saffron, Marina Mist, Certainly Celery, Peach Parfait, Chocolate Chip
paper: So Saffron, Very Vanilla, Marina Mist, Peach Parfait CS; Pocketful of Posies DSP; Designer Patterns Stack (Subtles)
xtras: Dazzling Diamonds; Linen Thread; SU buttons [retired]; 1 3/4" Circle punch; 2 3/8" Scallop Circle punch; Circles die; Marina Mist 1 1/4" Striped Grosgrain Ribbon

Tuesday, August 9, 2011

Embossed Wedding Frame

Happy Tuesday evening all!  Tonight, I'm sharing a simple but elegant card I made for a co-worker's wedding.  The photos really don't do justice to the sparkle and sheen of this "Happy I Do Day" card.  The base is Baja Breeze over which I laid a piece of cardstock vellum embossed with the Elegant Bouquet embossing folder.
Notice the embossed envelope too!  The vellum looks so pretty covered in Dazzling Diamonds and basic pearls:
But the really cool part is the embossed oval around the sentiment which was made with the new Designer Frames embossing folders (#123130).  There are two in the set:
and their size, 4-1/2" x 2-7/8", means that you can place them just about anywhere to create an embossed frame.  Here, I sandwiched my vellum cardstock in the oval folder from the side and ran it through the Big Shot:
Isn't it pretty?  Happily, the Wide Oval punch fits right in the center too!  I used silver Stampin' Emboss powder for the Word Play sentiment and popped it out with the wide oval punch.  A little whisper white organza ribbon hid the row of snail tape at the top.  And those pearls?  Not only are they pretty, they're hiding glue dots used sporadically to hold the vellum in place!  

Would love to know what you think of tonight's card.  Let me know if you have any questions and thanks for stopping by!

supplies:
stamps: Word Play
ink: Versamark
paper: Baja Breeze, Whisper White & Vellum cardstock
xtras: Designer Frame embossing folders, Elegant Bouquet embossing folder; Wide Oval Punch; Whisper White organza ribbon; Basic Pearls; Mini Glue Dots; Dazzling Diamonds; glue pen

Monday, August 8, 2011

Birthday Blog Hop

Come on and join the fun!  Today is a special day because it's Lesley Croghan's birthday!  Lesley is the founder of The Paper Players and someone that I am proud to call a friend.  She works tirelessly to make The Paper Players the best team it can be and strives to highlight new talent. She gave me my first spot as a Guest Designer and I will be forever grateful.  In honor of her birthday we have organized a Birthday Blog Hop of projects filled with happy thoughts and best wishes for our friend! 
I've noticed that Lesley has used the Up, Up & Away set recently so I started there...
It's a simple card based on a sketch from Clean & Simple Stamping and some gorgeous colors from the gals over at Colour Q: Lucky Limeade, Tempting Turquoise, Bashful Blue & Basic Gray.  Love these colors together!  I know you can figure it out but let me show you a few highlights:
I sponged the sky with Bashful Blue ink and a piece of cardstock punched with the scallop circle.  Sponging around the circle and moving it gives a lovely cloud effect.   Lucky Limeade and Tempting Turquoise markers inked up the balloons which I fussy-cut and decorated with Dazzling Diamonds.  Couldn't resist adding a few of my favorite cupcake clouds!
Some more clouds from the same set decorate the corner of the base and balance out the balloons while a few Basic Gray birds ride the breeze.

So, we hope you'll ride the breeze to the other Birthday Blog Hoppers, found below, and then make a stop at Lesley's blog, Always Playing with Paper, to wish her a Happy Birthday!  Thanks for stopping by today...Happy Birthday Lesley!

Birthday Blog Hoppers:

Anne Marie Hile - Stampin’ Anne
Carrie Gaskin - Artistic Avenger
Cindy Beach - Stamps, Paper and Ink
Jaydee - Stampin’ with Jaydee
Jen Mitchell - I Create
Joan Jeffery - JJ Creations
Lauri Ingram - Paperville
Laurie - Hiding in My Craft Room
LeAnne Pugliese - wee Inklings
Nance Leedy - Canopy Crafts (you're here!)
Rita Wright - Cards by Rita
Sandra Azzopardi - Sandra’s Stamping Spot
Tui Nathan - Stampin’ Time

    Sunday, August 7, 2011

    Can't Wait for School {PP58}

    Happy Paper Players Sunday, friends!  This week Ann is our hostess for a fun theme challenge and it's back-to-school time! 
    No matter how much you love school everyone loves recess, right?  So I knew right away which stamp set I would be using from the Summer Mini Catalog--Recess!
    Most of the kids I know are still young enough to love school so the expression on this little boy's face captures the enthusiasm of that first big day.  In fact, this card will be heading to a sweet little friend who starts his first day of kindergarten this month!
    I stamped the little boy in jet black Stazon on Whisper White and colored the image with a blender pen and ink pads: Riding Hood Red, Daffodil Delight ad Crumb Cake.  The playground tree is from the Trendy Trees set with a few clouds from Up, Up & Away.
    I stamped the hopscotch pattern, also from the Recess set, repeatedly on Basic Black cardstock with Whisper White craft ink.  The craft ink gives the perfect chalk effect for a sidewalk game!  The Daffodil Delight background was distressed with the 7-sided tool (love that thing!) and edged with the Spiral Border punch.
    My new Pennant Parade stamp set and coordinating Petite Pennant punch went to work here as well.  I stamped the faux stitched border onto polka dot patterned paper from the Designer Paper Patterns Stack in brights (Old Olive & Daffodil Delight), neutrals (Crumb Cake) and regals (Riding Hood Red).  Love these pattern stacks--they're a great value!  The Petite Pennants punch popped out the sweet little pennants which I adhered to some 1/8" Old Olive taffeta ribbon with sticky strip.  The Daffodil Delight stars and sentiment are all from Pennant Parade too! 

    So whether you have children of your own in school or not, I'll bet you know somebody who is starting a new school year soon.  Wouldn't they love to receive a card from you to kick the year off right?  I know they would...and we would love to see it over at The Paper Players.  Be sure to link up your creation before Friday, August 12th at midnight (PST).  We have a new Guest Designer joining us this month, the Artistic Avenger herself, Carrie Gaskin!    Check out all the fabulous inspiration from Carrie and the rest of our design team---have I mentioned how great these ladies are?!

    The Paper Players Design Team

    supplies:
    stamps: recess, trendy trees, up up & away
    ink: basic black, old olive, crumb cake, riding hood red, whisper white craft, jet black stazon
    paper: crumb cake, basic black, daffodil delight, whisper white
    xtras: 2.5", 1/2", & 3/4" circle punches, petite pennants punch, 1/8" old olive taffeta ribbon, spiral border punch [retired], blender pen

    Thursday, August 4, 2011

    Crisp Clean Summer: {CCMC161}

    Hi friends and welcome to the Thursday Challenge at Create with Connie & Mary!  Last week's challenge was a doozy for me but it looks like many of you really rocked that crazy sketch!  This week Connie & Mary went much easier on us with a classic and elegant color combination:
    I love black and yellow together--it always makes me think of crisp summer clothes with clean and classic lines, very Talbot's if you know what I mean!  Here's my take on crisp, clean and summer:
    If only the weather had been bright and sunny for a better photo!  I have been itching to try this simple technique with the Flower Fest set and I chose the big beautiful zinnia.  I stamped it in Jet Black Stazon and then colored inside each petal with a Daffodil Delight marker--it really gives the flower dimension doesn't it? 
    Of course, I stamped it a few more times and cut each successive layer out and popped it up on a dimensional.  Adding a little dazzling diamonds and a Basic Black Glimmer Brad to the mix as well.  The Old Olive snuck in in a scrap of embossed cardstock I already had.  The leaves were punched with the Build-a-Blossom punch and bent for added interest.

    Clean and classy absolutely must include polka dots and this card has twice the polka dots!  This is my first use of the new Polka Dot Scallop ribbon and it is lovely!  Here, I wrapped one piece around the front of my cardstock and secured it to the back with snail.  Made a loop of ribbon from a separate piece, pinched in the middle, added a Glimmer Brad and adhered with a glue dot...instant bow!
    And one last detail to show you that adds so much to the card IRL.  I heat embossed more zinnias in the opposite corners of my card base for added texture and shine.  It's difficult to capture in the photo but it really pops! 

    I hope you've enjoyed my Crisp Clean Summer card today....I'd love to hear your comments.  I read and treasure each and every one of them!  I know the rest of the Create with Connie & Mary design team has some amazing projects for you so be sure to stop by.  We hope you'll join us this week, I'd love to come visit you!

    supplies:
    stamps: bring on the cake, flower fest
    ink: jet black stazon, versamark
    paper: basic black, whisper white, daffodil delight, old olive CS; designer series pattern stack (brights)
    xtras: glimmer brads (nuetrals); polka dot impressions folder; top note die; basic black polka dot scallop ribbon; 2 3/8" scallop circle punch; build a blossom punch; black stampin' emboss powder