Pages

Sunday, September 4, 2011

Flutterby Birthday {PP62}

Happy Paper Players Sunday, friends!  Changes are afoot here at The Paper Players as we say goodbye to our dear friends on the summer design team and our August guest designer but welcome our new Fall team aboard!  I am so excited to be stamping alongside these gals--they have some amazing creations to share with you!  Me...not so much today--I had a hard time finding my mojo on this one so I turned to a favorite color challenge site and discovered a double challenge!


...to create this for you:

Not sure this is exactly what I had in mind when I set out but it's growing on me.  I do love this color combination and had fun featuring all the gorgeous Pool Party cardstock!   Three rows of Pool Party were punched with the Lace Ribbon border punch and adhered to basic black.  The Tangerine Tango scallop dots ribbon was made a little wider with a strip of TT cardstock underneath.


The double butterfly is made with the Beautiful Butterflies die and the Beautiful Wings embosslit.  I wish now that I added another rhinestone to the two smaller butterflies--funny how stepping back in a photograph can make small things obvious!  I thought the whimsical sentiment from Happiest Birthday Wishes added the perfect sense of movement with the butterflies.

Thank you so much for stopping by today...do hop over to The Paper Players to check out the amazing creations of the entire Design Team...I am so lucky to be working with these gals!  I hope that you will play along with us this week...you always need a birthday card for the stash, right?!  If you join us, please link up your creation at The Paper Players by Friday, September 9th at midnight (PST) to be considered for Headliner and A Cut Above.  I hope you are having a great weekend!

The Paper Players Design Team
Tara Bilbao
Sandra Conner (September GD)
Photobucket

supplies:
stamps: happiest birthday wishes
ink: jet black stazon
paper: pool party, tangerine tango, whisper white, basic black, melon mambo CS; patterns designer stack (brights)
xtras: tangerine tango scallop dots ribbon; beautiful wings embosslit; beautiful butterflies die; basic rhinestones; lace border ribbon punch

Thursday, September 1, 2011

Holiday Mini Ribbon Share!

The day is finally here!! The Holiday Mini Catalog went live today and I'm so glad you can enjoy it now too! 


Click the cover to take a look...did you see the ribbon?! Quilted satin ribbon in Cherry Cobbler and Early Espresso (pg. 30) and Very Vanilla Velvet ribbon (pg. 22), oh my! To buy all three rolls would cost you almost $24 bucks but how about just $5 for one yard of all three ribbon styles?!  Aren't they lovely?


If you think so too, then you'll be happy to know about my Holiday Ribbon Share...just $5 for one yard of each ribbon!  All ribbon will be wrapped on poster board and packaged in plastic so it arrives to you clean and wrinkle-free!  If you would like to join in, please send the following information to me via email (nleedy@cox.net):
  1. Your name
  2. Your mailing address
  3. Your email address
  4. Number of shares you would like to order
  5. Any additional instructions
I will send a PayPal invoice to the email address you provide.   

Shipping within the continental US only
$2.00 anywhere in the continental U.S. for up to two shares, $1.00 for each additional share.  Shipping amounts will be added to the cost of the share and will be included in your PayPal invoice.  Thank you for your support!

Photobucket

Leaves of Autumn {CCMC165}

Happy September 1st, friends, and welcome to another week at Create with Connie & Mary!  Wow, September 1st is a great day because it's the first day of the Holiday Mini Catalog!  It's an exciting time at CCMC, too, because subscriptions to the Holiday Edition of CCMC are now available with early bird pricing--that's $5 off the normal $34.95 price...$29.95 US for six weeks of daily posts and tutorials featuring items from the Holiday Mini.   So, how about this week's challenge?!  It's a fabulous color combination perfect for autumn or Halloween cards:
And here is the Thanksgiving card I designed using The Paper Players sketch:
 
Next to birds and leaves, trees are my favorite stamp images--I think I own every one that SU makes.  So, of course, I had to have Leaves of a Tree from the new Holiday Mini!  I embossed it in gold onto Very Vanilla cardstock and colored scattered leaves with a Blender pen and inks in all three challenge colors.  Here's a closer look:
Love the effect mixed with the gold embossing!  I find that the blender pen + ink pad technique gives me better control over the color strength than if I colored with markers.  For small detail work, like these leaves, the colors show up better in a slightly lighter shade than I would get with a marker. 
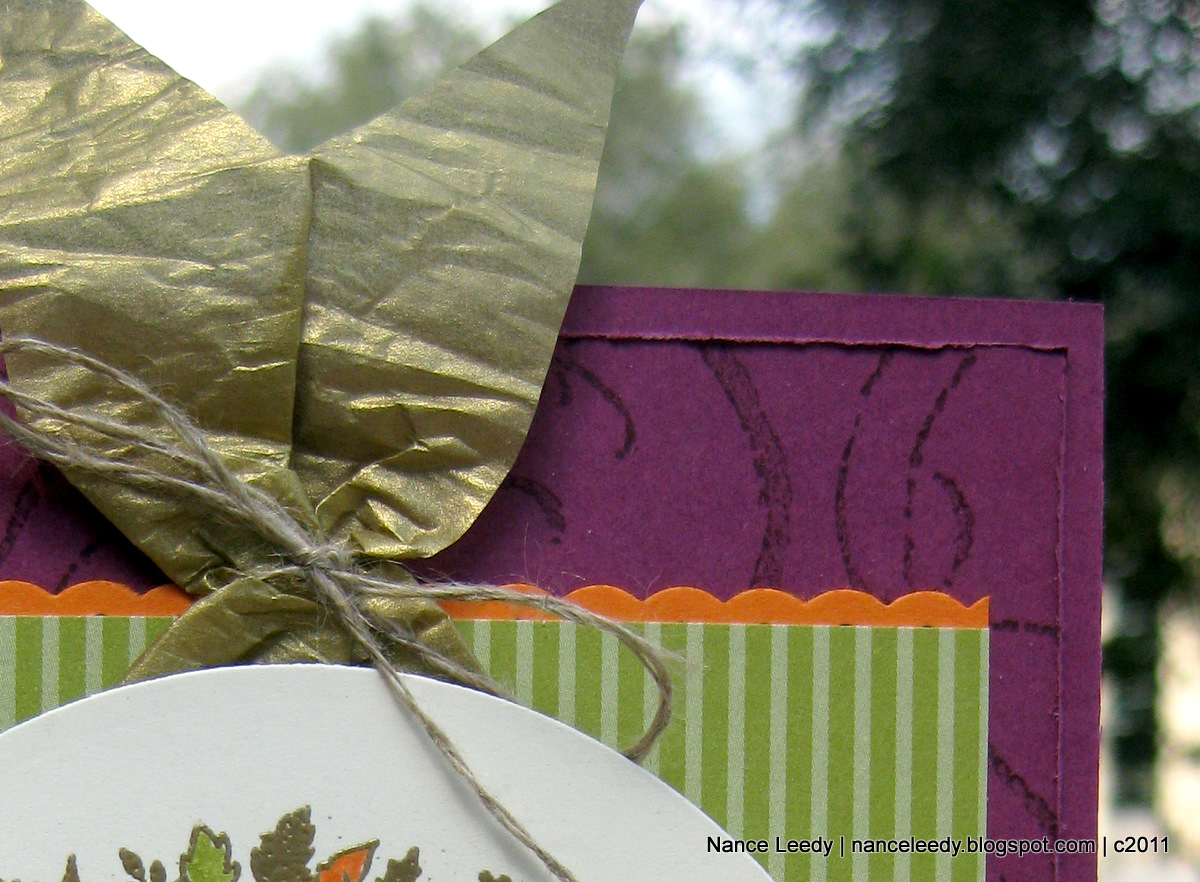
The Rich Razzleberry panel was stamped with the same ink on the French Filagree stamp and the edges were roughed up with the 7-sided distressing tool.  That's some Lucky Limeade patterned paper from the In Color patterned paper stack trimmed out in a tiny punched Pumpkin Pie scallop ribbon border.  Instead of ribbon, I wrapped some gold Waffle Paper around the front panel, scrunched it with some linen thread and secured with a glue dot--instant gold ribbon!
And finally, I was channeling my friend Carrie Gaskin with this little sentiment banner!  She uses them often on her cards and I just love the whimsical look of them!  The Fabulous Phrases sentiment was stamped in Rich Razzleberry onto Very Vanilla and over stamped with a Pumpkin Pie leaf from Day of Gratitude.  My paper snips cut it into a rectangle and the 1 1/4" square punch turned on an angle made the flagged ends!  Isn't it cute?  Thanks for the inspiration, Carrie!

Well, I hope I've inspired you to play along with these gorgeous fall colors at Create with Connie & Mary.  Be sure to stop by and see all the wonderful Design Team inspiration.  If you play along with us,  please link your card up to Create with Connie & Mary by Wednesday, September 7th at 12 noon (EST).
Photobucket
supplies:
stamps: leaves of a tree, day of gratitude, fabulous phrases
ink: rich razzleberry, pumpkin pie, lucky limeade, versamark
paper: rich razzleberry, pumpkin pie, very vanilla CS; in color designer patterns stack
xtras: 3" circle die; gold waffle paper; linen thread; brads (brights); 7-sided distressing tool (cutter kit); paper snips; 1.25" square punch; scallop ribbon border punch; stampin' emboss powder (gold)


Sunday, August 28, 2011

Easy Holidays {PP61}

Happy Paper Players Sunday, friends! Our talented team mate, Jaydee has a fabulous sketch for you this week:
I love this sketch and I think I will be using it a lot--thanks Jaydee!  Right away, it brought to mind tree ornaments and holiday cards so with the holiday season a mere two months away, I thought it was time to get started on my stash of Christmas cards!
I see that I wasn't the only team member who used this fun set called Easy Events!  The delicate spray of leaves and berries is so clean and I love that the sentiment is built right in for perfect alignment every time! The black card base has an extra layer of black that was embossed with the Vintage Wallpaper folder and spritzed with homemade Glimmer Spray.  The center panel is First Edition specialty paper trimmed with a sliver of Real Red punched with the scallop ribbon border punch.  I tucked some 1 1/4" Old Olive striped grosgrain ribbon under the embossed black panel at the bottom, tied it with some Very Vanilla seam binding ribbon and attached at the top with a big glue dot.  Attaching the ribbon to the extra layer of black cardstock saved me from wrapping it around the whole card front and saved quite a bit of ribbon!
The berry sprig was stamped onto Very Vanilla with jet Black Stazon and the leaves were colored with an Old Olive watercolor crayon.  I just bought my first set of these and I love that they come in each color family and give a watercolor effect without the water and no pilling of your paper!  My favorite detail though is the Basic Rhinestones colored with a red Sharpie marker.  Just color them right on the backing paper, wait a few seconds to make sure they are dry and peel them off as usual!  Such a great technique for making custom colored rhinestones.  (BTW, the wide tip Sharpies give the best coverage).  Wanna see a closer look?
Cute, eh?!  I haven't shown you the inside of a card in a while so I made sure to finish this one for you:
An Old Olive frame from Four Frames was the perfect companion to the sentiment from Petite Pairs.  So, friends, what do you think?  I'd love to hear from you.  Big thanks to all who continue to leave comments for me even though I haven't been 'round to visit lately.  Commenting has taken a back seat to the new school year, busy days at work, and a traveling husband!  I hope to get around to see you all soon--thanks for being patient with me! 

In the meantime, be sure to check out the fabulous inspiration from the rest of The Paper Players Design Team as we say goodbye to our Summer Designers, Lauri and Sandra as well as our August Guest Designer, Carrie.  They have been wonderful to work with and I'm so glad to have "met" them all.  If you decide to play along with us, and we hope you will, be sure to link up your creation to The Paper Players by Friday, September 2nd at midnight (PST).
The Paper Players Design Team
Photobucket
supplies:
stamps: easy events, four frames, petite pairs
ink: jet black stazon, old olive, real red
paper: basic black, real red, very vanilla CS; first edition specialty DSP
xtras: old olive 1 1/4" grosgrain ribbon; scallop ribbon border punch; circle scissors; very vanilla seam binding ribbon; watercolor crayons (brights); basic rhinestones; sharpie marker

Thursday, August 25, 2011

Haunted Forest {CCMC164}

Happy Thursday friends and welcome to another week with the Create with Connie & Mary design team!  We know how much everyone loves a sketch and this week's is a fun one.  Check it out:
As you will see, I took a few liberties with the sketch so feel free to use it as inspiration!  Instead of a square, you could make a standard A2 size card as I did:
I couldn't wait to a) order the Haunted Forest (upcoming holiday mini) single stamp and b) play with it!!  This sketch gave me the perfect canvas for this stamp.  I heat embossed it in black onto Very Vanilla cardstock and sponged the Rich Razzleberry sky with a More Mustard moon.  So spooky!  You have to see this stamp up close to wonder at the detail of it:
and there's even a little mouse in the corner:
Aww!  You can also see that I added some Old Olive grass to tie in with the Old Olive mat.  That itty bitty grass stamp is a favorite of mine and it's from the Pony Party stamp set...go figure!

I hope you enjoyed today's card--I sure love this stamp!  I hope you do too because you'll likely see a lot more of it, LOL!  Be sure to pop on over to check out the rest of the Create with Connie & Mary design team for some fabulous inspiration!  Have a great day friends!


supplies:
stamps: haunted forest (holiday mini); pony party; woodgrain (of course!); four frames
ink: rich razzleberry, more mustard, versamark, old olive
paper: rich razzleberry, more mustard, old olive, very vanilla
xtras: black stampin' emboss powder; decorative label punch; black wide striped grosgrain ribbon; glimmer brads (neutrals), 7-sided tool; color spritzer; crumb cake marker